
GoPro cameras aren't designed to record near-infrared images without being modified, but with a few simple accessories we can make it happen.
GoPro cameras have a filter installed inside the camera to block infrared wavelengths from reaching the sensor, but often these internal filters aren't 100% effective and do let a small amount of infrared information through.
We are going to take advantage of this inefficiency and use the small amount of infrared that does get through to create our image. To do this we will need to block all visible light from reaching the sensor.
We will attach an infrared transmission filter (blocking all visible light) to the front of the camera so that only infrared wavelengths reach the sensor. The easiest way to do this is to place your GoPro in a cage with a filter mount attached to the front. This cage will also allow you to attach the camera directly to a tripod which will be needed for the relatively long exposures required to record our images.
These cages aren't expensive and can be purchased for any GoPro model. You can also use them for attaching other accessories like Polarizing or Neutral Density Filters.
With some cages, you will find the filter casing covers the corners of the image due to the very wide-angle lens on the camera. I choose to shoot the image without any in-camera processing (RAW images), and crop during post processing to remove the corner vignetting. You could add a filter step up adaptor and attach a much larger filter to see if this helps remove some of the corner cropping issues.
I removed the protective glass in front of the camera so there would be one less piece of glass to cause optical problems (this step is optional).
I am using a "deep" infrared filter (B+W 093) but there are many styles of infrared filters out there. This filter only lets infrared wavelengths pass through while other filters allow a bit of visible light to also pass through. These other filters can also create very interesting images.
Set your camera to record RAW images. This will give you the best quality image and allow for better post processing. We will be recording a color image in the camera but they will eventually be converting it to a grayscale image.
You will need a tripod or some way of holding your camera motionless during a long exposure.
Depending on what ISO you choose, your exposure could be between 1 and 30 seconds long. The image we are looking at today required a 20 second exposure at ISO 100.
You will need to set the exposure manually so become familiar with using this mode. After a few exposures, you will become comfortable with exposure times needed for the types of scenes you are recording. It will be trial and error for the first few images so be patient.
Try and shoot with the sun at your back; this lessens the possibility of creating glare and ghosting in your image (unless you want these for effect).
When you begin, try and photograph on bright sunny days. Scenes on overcast or dull days tend to be low contrast and require very long exposures. Vegetation looks much better when illuminated by bright sun.
We are using Adobe Camera RAW and Photoshop for this example but any image editing software capable of processing GoPro RAW images (.GPR) will work for this project.
About: Paul Illsley
Infrared Images with a GoPro Camera
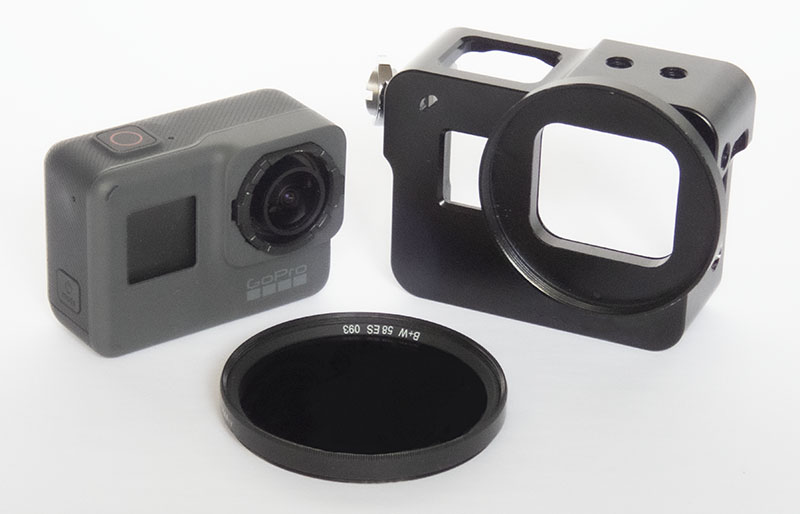
GoPro camera with cage and B+W 093 IR filter

Transmission curve for the B+W 093 filter.
This graph shows that the 093 filter blocks visible light (400nm - 750nm) and transmits wavelengths longer than 825nm (near infrared).
Procedure:
Processing:
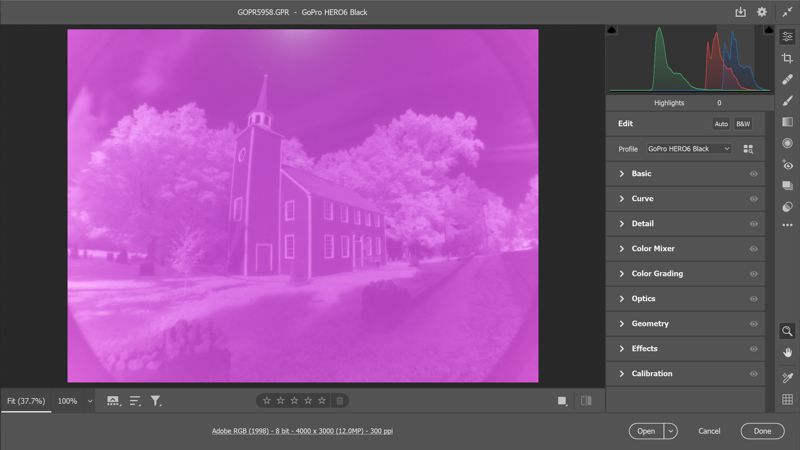
When you open your GoPro RAW image (.GPR file) in Adobe Camera RAW it will appear red.
This is a default rendition because it is showing you all 3 color channels (RGB).
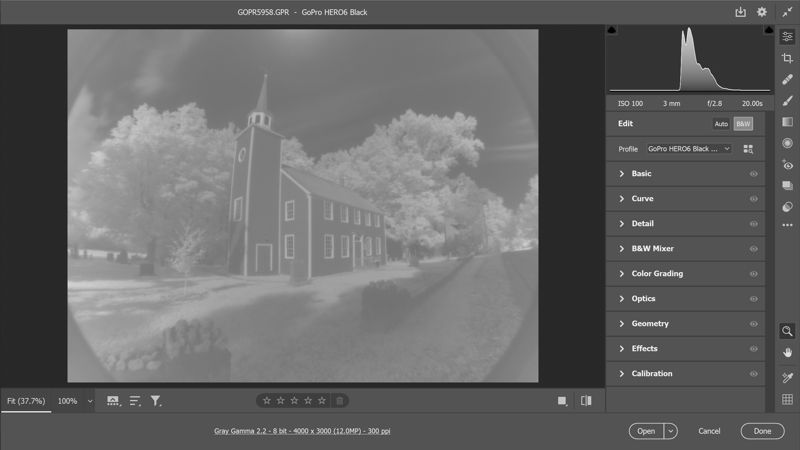
Convert your RGB color image to Grayscale using the B&W conversion tool.
I have chosen the default conversion for this example but you can explore some of the internal conversion profiles if you wish.
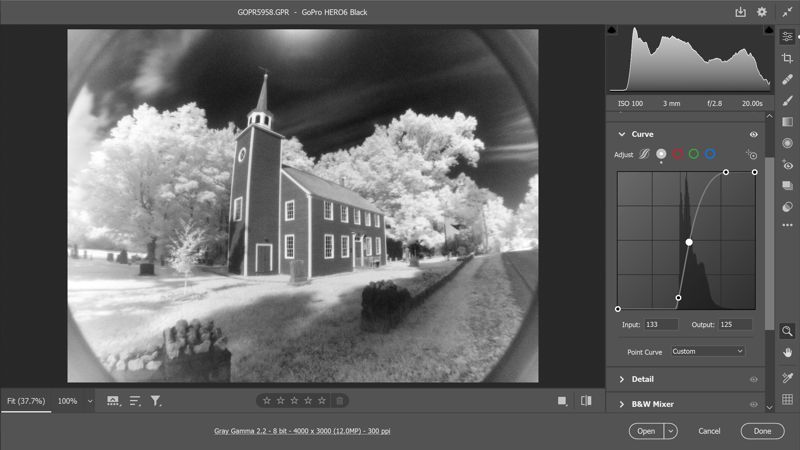
Use the Curve tool to adjust the contrast in your image.
Make any further enhancements before opening the image in Photoshop.
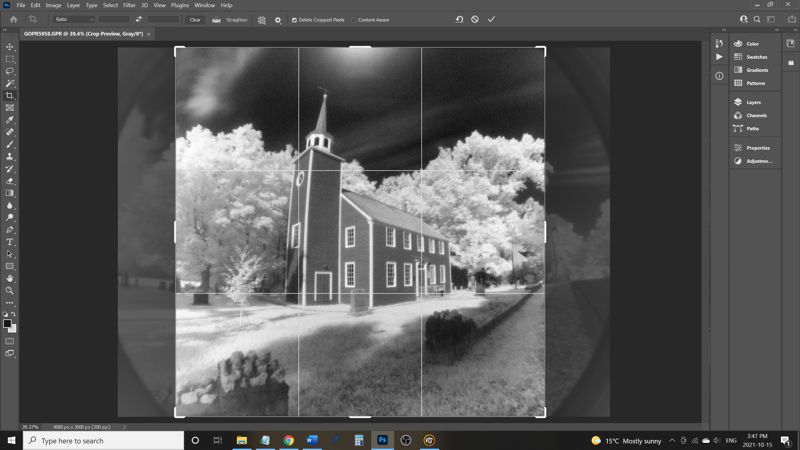
Now that you are in Photoshop, you can crop your image to remove the edges of the filter.
You can now export your image.
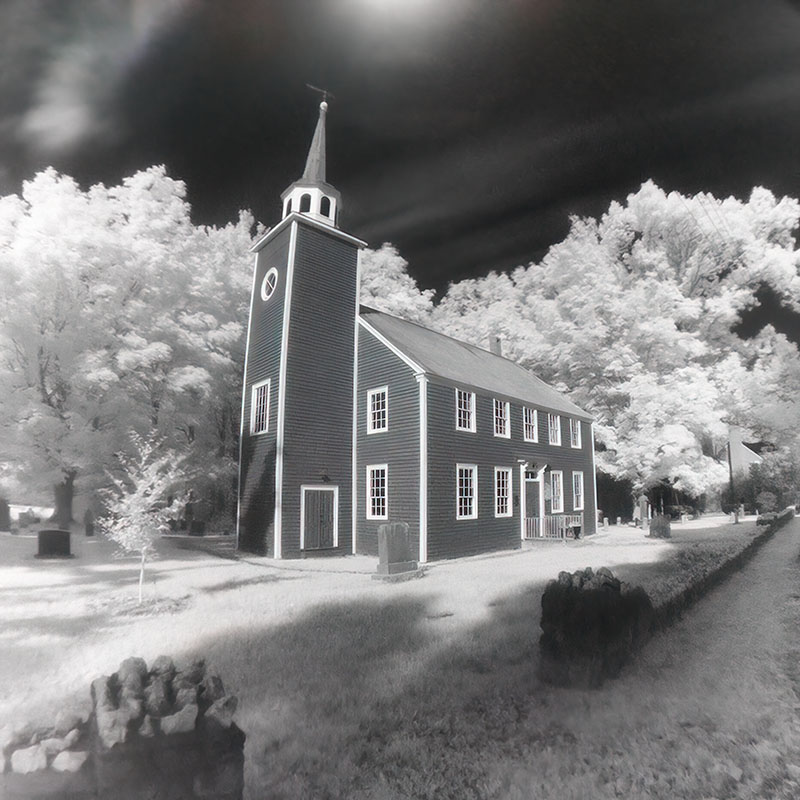
(The Covenanter Church, Grand Pre, Nova Scotia, Canada)
Return to Paul Illsley's home page